

Video editing is all about making a simple video look stunning with cool visuals and effects. There are tons of video effects, out of which distortion is one of its own kind, and preferred by a lot of video editors to give a cool touch to their videos.
We have already seen thousands of TikTok videos with distortion and glitch effect, which does look pretty amazing if used properly. If you too wish to add a distortion effect in your videos using Wondershare Filmora X video editor, then this article is a must-read.
In this article, we will be writing down the step-by-step process to add a distortion effect in your videos, so without waiting further, let’s get started.
How To Add Distortion Effects In Wondershare Filmora
It is pretty easy to use the distortion effect in Wondershare Filmora X, in case you haven’t fully explored the video editor yet, read this guide.
Launch Wondershare Filmora X on your PC, like you normally do and import footage. Now drag and drop the footage onto the timeline and get ready. 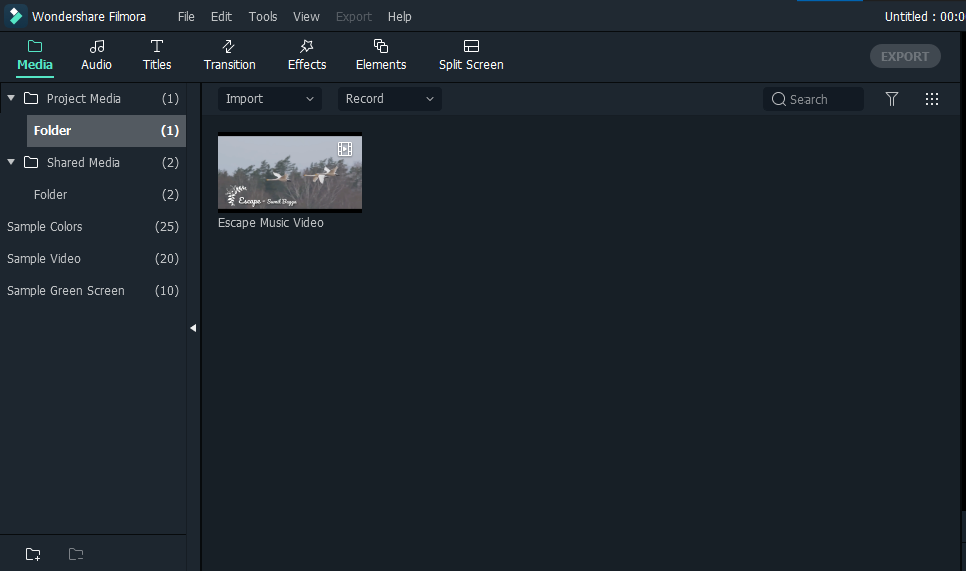
Now click on the Effects option in the top toolbars section and a list of the effects will show up on the left sidebar of the screen.
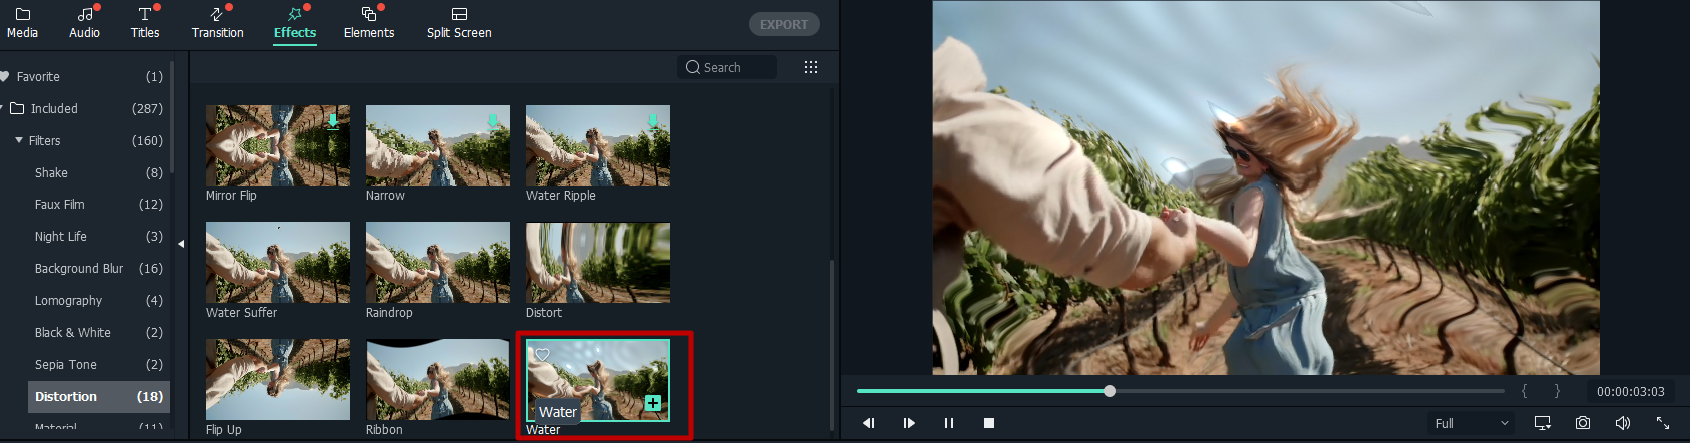
Click on Filters and then click on distortion to open the list of distortion effects in Filmora X. 
There are a total of 18 distortion effects in there, all of them are good if used properly, but for now, let’s use the “distort” effect.
Click on the effect, drag it and drop it on the timeline, this gives you better control over the effect. If you directly drag it on the raw footage, the effect will be applied to the entire video, and that’s something you should avoid while editing a long-duration video. 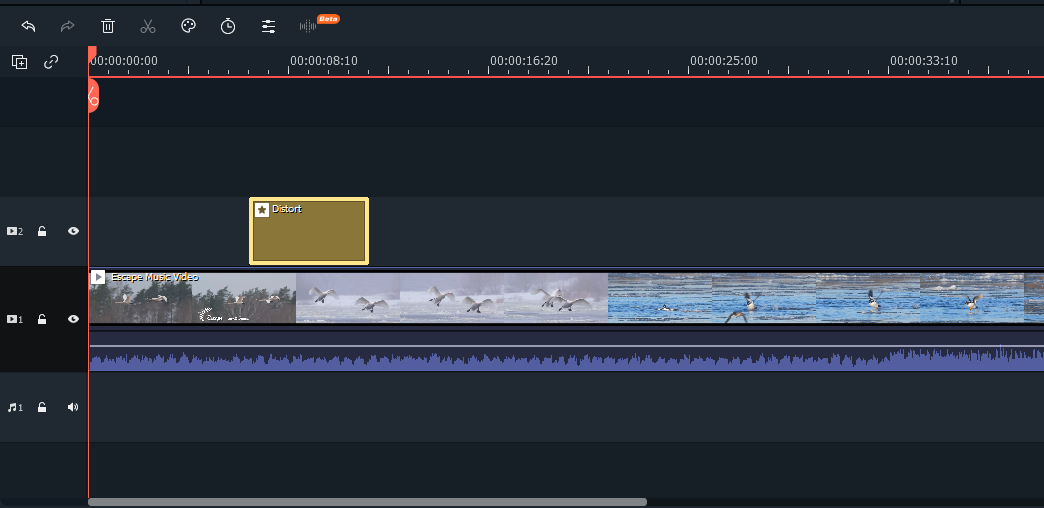
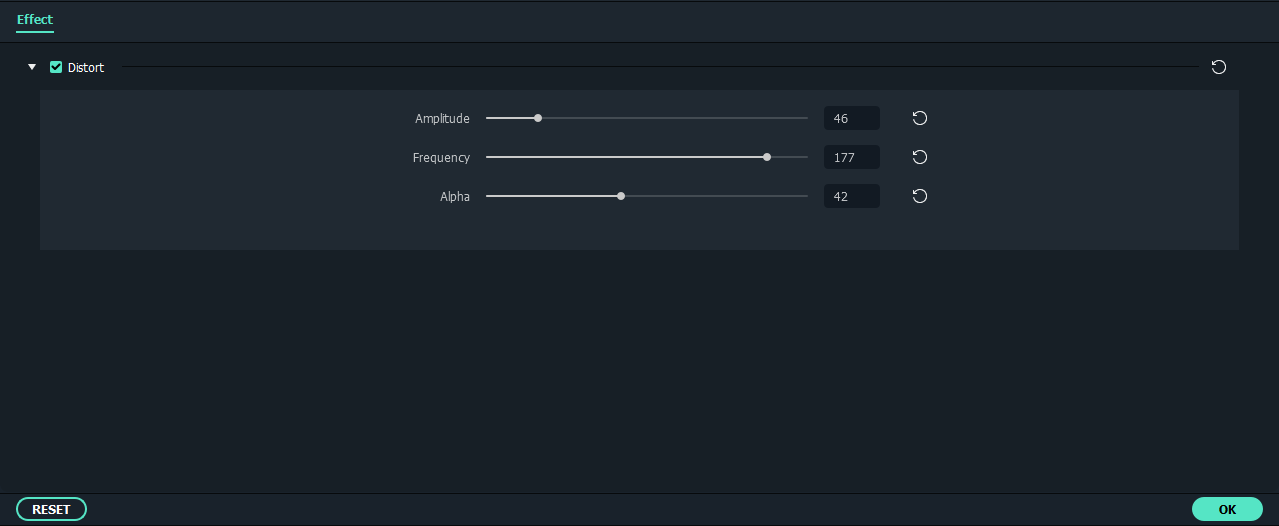
Once done, double click on the effect, and the settings for distort effect will show up, you can adjust them according to your requirements.
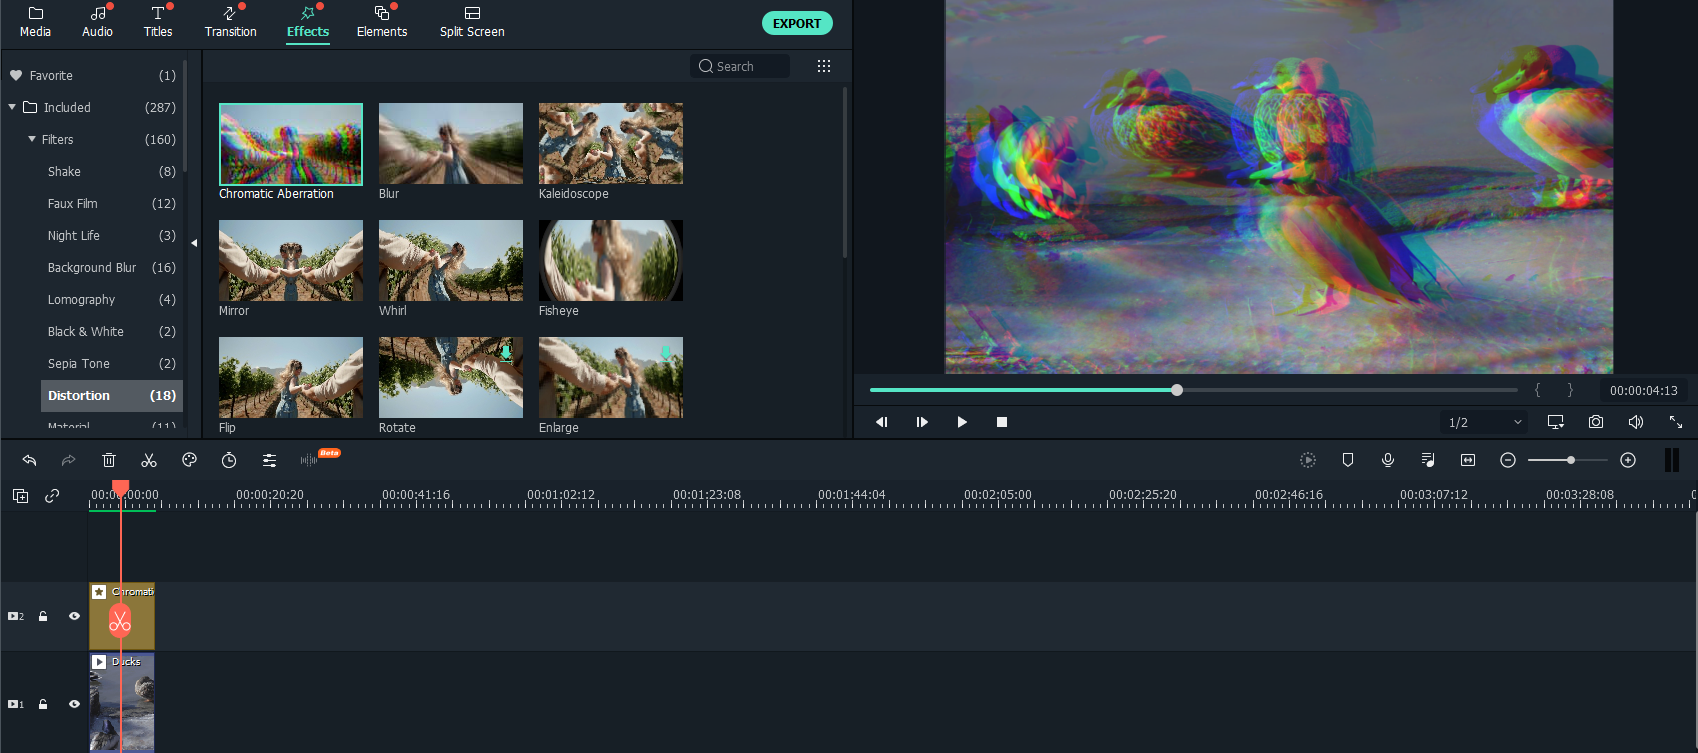
That’s it. You can try the same with the other effects in the distort section, I recommend you try Chromatic Aberration too. And below is a screenshot of the video footage applied to the Chromatic Aberration effect.
If you don’t want to apply the effects one by one to check the distortion effect, just double click it and you will see a sample video that shows the result after applying the effect in the preview window.
The above steps introduce how to add distortion effect to video in Filmora X, however, you can also add distortion effect to the audio in it. You can watch this video tutorial about Filmora audio effect https://www.youtube.com/watch?v=WWyhZPTpeDM and find out how.
Key Features of Filmora X
Wondershare Filmora is a perfect tool for beginners as well as professional video editors. In case you find Adobe Premiere Pro, and other video editors too complicated for your use, Filmora X is the perfect match for you.
Let’s take a sneak peek at its features in the latest version.
Silence detection add-on
This feature of Filmora detects silent pauses and then removes it automatically.
Motion Tracking
Attach an element to a moving object, including moving objects like faces or license plates in your video easily with auto motion tracking.
Animation Keyframing
Add animation keyframes to change the position, rotation, scale, and opacity of a clip.
Color Match
Match the color of selected clips to another frame from another clip.
Tons of Effects
Filmora X is packed with more than 800 video effects to give your videos a professional touch.
Texts and titles
This sounds like a very basic feature of video editors, but the advanced text and titles features of Filmora lets you add titles and text in the video perfectly, with all sorts of customizations and animations.
Music library
Who doesn’t love background music in videos? But using copyrighted music may invite troubles to your YouTube channel, isn’t it? Filmora X gives you a library of copyright-free tracks that you can use in your videos.
Green screen
Another amazing feature of Filmora X is the green screen, which allows you to change the background and add special effects to the videos using the Green screen.
Color correction
Video editors know the importance of the correct colors in the videos, and with Filmora’s color correction tool, this has been made easier.
Audio mixer
Another amazing feature of Filmora is the audio mixer which allows you to perfectly blend the audio with the video without compromising with the frequencies and volume.
Screen recording
Filmora is a feature-packed video editor and comes with the screen recording feature as well. If you usually create troubleshooting videos for Windows, this can be a useful feature.
Plans and Pricing
All of these amazing features are totally free to use, but there will be a watermark after the exported video. To remove the watermark, you need to purchase a plan. Currently, the plan is divided into two types annually and perpetual. According to Wondershare, the perpetual plan is the most popular plan that will provide free updates for the Filmora version X, but not the version beyond X. The cost for this is $ 69.99.
The annual plan is billed at $39.99/Year, which again has all the features included. The pricing for the macOS version is also the same, but the annual subscription is $44.99/Year.
There are multiple modes of payment gateways and cards accepted so that you don’t find it difficult to get hold of such amazing software.
Wrapping Up
The distortion effect looks pretty cool if used correctly. In this article, we have learned how to add a distortion effect in Wondershare Filmora X. Moreover, we have even discussed the key features of the software and its pricing.
Follow Technoroll for more informative articles.


