

Creativity has no limits. Anyone uses artistic traits and transforms even the simplest into the most appealing. The media world does not remain unaffected as well. There are several ways in which you can make your media files look impressive. With the passage of time technology has transformed the world of media too. In the early years of tech and media coming together, people had the choice to edit and alter the still photographs to make them look as desired. With the passage of time now it is possible to do the same with the videos too.
If you are a macOS user looking for an impressive tool to create, edit and share videos then definitely Filmora X is the best choice for you. You will definitely love using it for an upgraded and improved impression. There is little to worry about the format and the size. It can work wonders with any of your choices.
Introduction to Filmora
Filmora is a simple video editing mac from the creators at Wondershare. It is the same company that has offered an extensive range of popular applications like UniConverter (video converter), Recoverit (data recovery tool), Dr.Fone (smartphone optimizer), PDFelement, FamiSafe (parental control app).
The recent version of Filmora X has made its mark in a very short time. Since Filmora 6 it has taken a giant leap offering more features and better functionality. Despite having a collection of features, what inspires me the most is simple working. It is for this reason that Filmora X has become a popular choice among beginners, vloggers, and YouTubers.
Getting Filmora X for Mac
Downloading: From the official website, you can check for the link that will lead to the downloading of the latest version of the application. Before you click to download, open the official website and choose “Switch To Mac Version ”. Double click the installer and then go to “Open in the security window”. If there is no button to check the System Preferences – Security & Privacy – General tab – Click Allow or Open. This is the only issue you can face during the installation.
The opening screen: After the download completes the start-up window appears on the screen. You can choose from the different aspect ratio options available that include 16:X (Widescreen), 1:1 (Instagram), X:16 (Portrait), 4:3 (Standart), and 21:X (Cinema). You can choose any option that suits you well according to your project. You can even continue with the old project by opening it.
Filmora preferences. Filmora is a very good application for video editors. In the preference section, you can check the settings. You can choose from these preferences and make a difference in your video. These settings include
- Speed up the video rendering and decoding by using the option of GPU acceleration.
- Check the Background render option by simply ticking the checkbox.
- It is easy to manage quality renders of files at a much greater speed especially when you are working with the 4K footage. This is possible by checking the Proxy option.
- You can adjust the default Transition, Photo, Effect, Freeze frame, Split screen duration time by simply clicking on the Editing section.
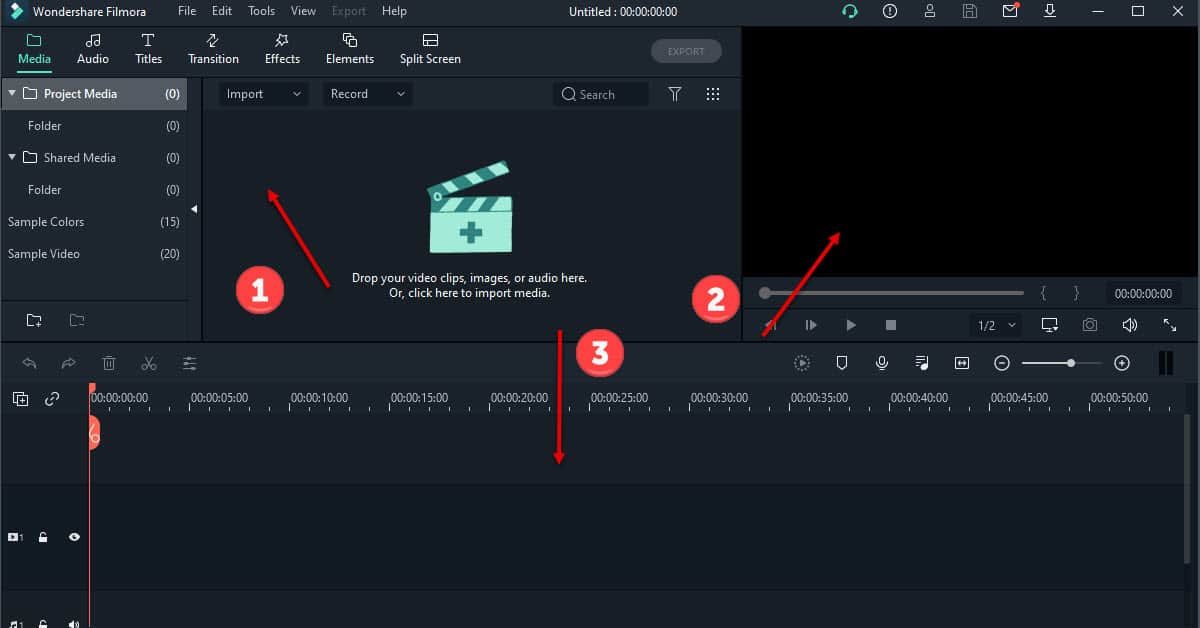
Import files, save, export: Adding media to Filmora can be carried out in three ways being an import, save, and expert. You can perform these tasks in the following ways:
- To import a file right click on the media work zone
- Menubar – File – Import Media – Import Media Files
- CMD⌘ + i
- Click on the icon that lies in the middle of the media work zone
- You can now drag and drop files to the media work zone
Importing the media folders is a great choice that can let you collect all essential files in one place and customize them by adding all essential features into them.
It is important to keep making the changes. The Autobacking feature happens to save your essential data after X minutes. There is no need to activate it as it is already there by default. You can configure this further by using the preferences.
If you want to export the project, just click on the Export button found on the media bar.
The Tools and Features
Timeline is the main workspace that is used in any editing program. This section in Filmora has all the unique features that include
- Adding tracks option to add media in both video or audio format and also for deleting empty tracks.
- Undo CMD⌘ + z / Redo CMD⌘ + Shift + z for making appropriate corrections.
- Delete DEL to remove the unwanted media on the timeline.
- Split works like a scissor to split the media files.
- The crop is used to crop or zoom selected video.
- Speed changes the possible playback speed and also helps in reversing the video file.
- Advanced Color Tuning to work with 45 presets or manually selected colors
- Green Screen.
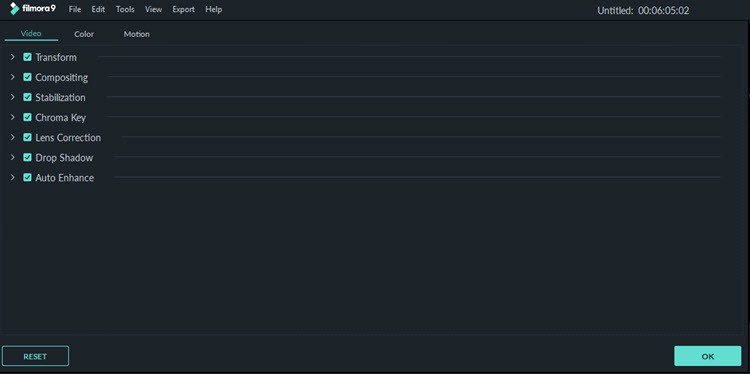
- Edit to help in doing tasks like transform, stabilize, drop shadow, auto-enhance, fade in/out, apply motion effects, etc.
- Render Preview for better processing of 4K.
- Add a Marker for marking the cue when it is needed.
- Record VoiceOver helps you in using the microphone for recording the voice.
- Audio Mixer meant for audio controls, balance and volume levels, etc
- .Zoom to Fit Timeline will let you stretch and fit the media timeline into the screen.
- Audio Indicator will let you turn on the visual display of the Master audio related to the project.
- Effects, Elements, Transitions, Pictures
- Main video track
- Audio track from a video file
- Separate audio track
Preview / View is a very important section that allows you to have a look at the videos that you have made so that better results are obtained. Under this function, you can find the following functions
- Challenge
- Account / Activate
- Purchase
- Message Center
- Filmora Resource Center
- Previous Frame / Next Frame
- Play
- Stop
- Playback Quality.
- Preview quality and display settings
- Snapshot
- Volume
- Full Screen
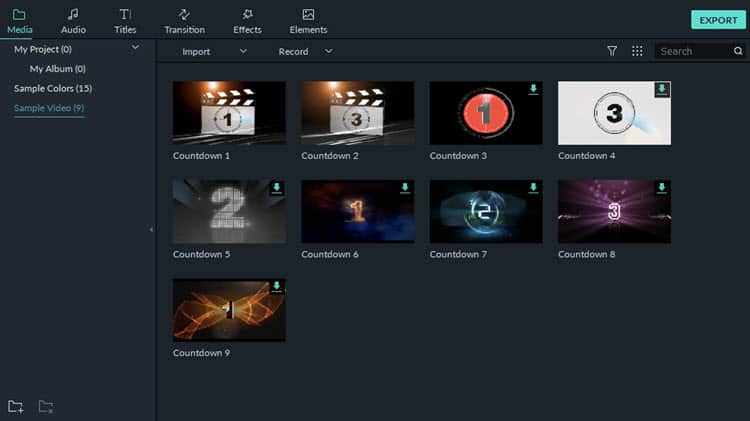
Media Block is your storage space. It is used to store all the essential multimedia files. It can help the creator by using the features of Transitions, Effects, Titles, Elements, Split Screen Options here as well. It comes with different sections and sub-sections.
- Media section for the imported files.
- Audio section permits adding favorite music from Filmora audio library, or iTunes.
- Titles section permits using 250 static and animated titles and credits to make the videos further impressive.
- Transitions have 200 original HQ transitions.
- Add from over 280 effects.
- Create an impressive video with 1X0 random elements.
- Split Screen gives the choice of using 30 presets for different split-screen separations.
- Export to save the project.
Screen capture
Use your screen to record your video. Go to File > Record Media > Record PC Screen. It will not just record the video from the screen but also has the ability to record the system sounds as well. Hit the REC button to initiate the recording. Once it is finished the video will be imported to the media zone.
Download Media
You do not need an additional downloader as Filmoro X has one in-built downloader. You can use it only with Flickr and Instagram. If you want to download the media files then go to File> Download Media > one of three options.
Rewards
There is a unique competition-like situation created in the form of the Challenge tab in Preview. Choose the tab to get a new task to complete like split a clip, crop, add video effects, or others. Once done you can get a reward. You can use different transitions, effects, or music that are constantly updated. You can then use the same for YouTube.
Exporting Video
Videos can be exported in two ways
- Exporting in the Menu bar
- Hit the Export button at the top of the media zone.
FilmoraX for Mac will let you export the videos after you have registered with the accounts. If you do not have an account you simply have to create an account and then log in to it so you can export the video. In the trial version once you export the file it will appear with a watermark.
Some Exclusive Features for Mac Users
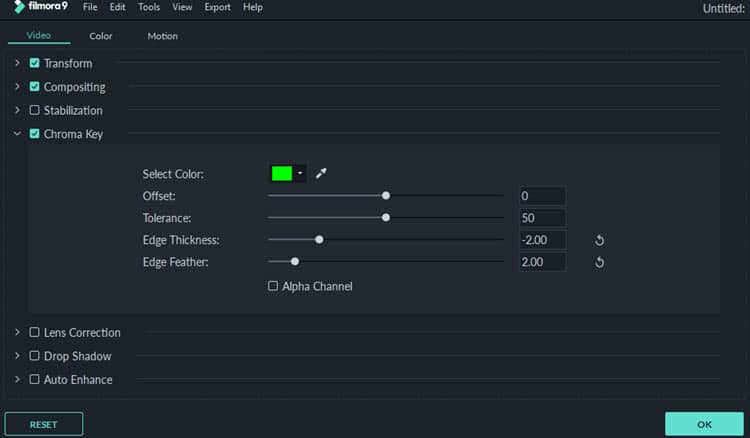
Green Screen
The Green Screen or Chroma Key module can handle applications in both straight green and blue, as well as any colors that you want to create an effect.
It also provides a variety of settings for your green screen videos in order to correct them.
KeyFraming
Keyframing helps you to make personalized animations and to monitor the effects you add to your projects extremely well.
Motion Tracking
This new module allows you to define a video object or point then monitor it to create a motion path automatically.
When this path is formed, every other object can be attached to the motion path and followed by the original object.
Color Matching
This is a semi-automated module that allows you to match footage from different sources or footage that was perhaps shot at different times of the day.
Supports M1 Chip
Newer FilmoraX software allows using a new and improved M1Chip, which will be used for MacBooks by Apple. The latest version of Filmora X 10.1 has recently begun. In order to be compatible with Apple’s newest 64-bit ARM architecture, the development partners want to update and innovate the software.
Autoframe
It might take time to cut videos. Are you spending a lot of time manually reducing movies in social media postings from different aspects? Hold on! Hold on! Hold on! Hold on! Stop! Stop! Stop! In Mac’s Wondershare Filmora 10.2 try the new automobile framework option! This saves you valuable time to modify.
https://www.youtube.com/watch?v=Huq9P0BSEJE
Touch Bar
Your Mac touch bar adjusts, depending on what you are doing, and provides controls to make your task more efficient. Filmora operates with its touch bar for an easy editing experience.
System Requirements
Operating System: macOS v11 (Big Sur), macOS v10.15 (Catalina), macOS v10.14 (Mojave), macOS v10.13 (High Sierra), macOS v10.12 (Sierra)
Processor: Intel i5 or better multicore processor, 2 GHz or above (Intel 6th Gen or newer CPU recommended for HD and 4K Videos, also compatible with Apple M1 chip).
Memory: 8 GB RAM (16 GB required for HD and 4K videos).
Graphics: Intel HD Graphics 5000 or later; NVIDIA GeForce GTX 700 or later; AMD Radeon R5 or later. 2 GB VRAM (4 GB required for HD and 4K videos).
Disk: At least 10 GB free hard-disk space for installation (SSD-Solid State Disk recommended for editing HD and 4K videos).
Pro of Filmora X
- •Uncluttered and Easy to Use Interface
- •Motion Tracking
- •One Click Audio Ducking
- •Vast Library of Transition, Audio, and Visual Effects
- •Intuitive Color Matching
- •Custom Animation
- •Comprehensive Guidelines
Cons of Filmora X
Free Version Only Allows Exporting of Watermarked Footage.
Supported Formats
Video formats
MPEG-1/2 Video file: (.mpg, .mpeg, .m1v, .m2v)
MPEG-4 Video file: (.mp4, .m4v, .3gp, .3g2, .3gp2)
QuickTime Movie File: (.mov encoded with H.264, MPEG 4 or MJPEG codec only)
Camcorder File: (.dv, .mod, .tod, .mts, .m2ts, .m2t)
Flash Video: (.flv, .f4v)
Audio Visual Interleave: (.avi – Windows format)
Matroska Video File: (.mkv encoded with H.264, MPEG 4 or MJPEG codec only)
HTML5 Video File: (.mp4, .webm,. ogv)
Non-encrypted DVD Titles: (.vob, .vro)
Audio formats
.mp3, .m4a, .wav, .wma, .ogg, .flac, .aac, .aif, .aiff, .caf, .au
Photo formats
.jpg, .png, .bmp, .gif, .tif, .tiff
Output formats
Common video/audio: .mov, .mp4, .m4v, .mkv, .avi, .f4v, .ts, .mpg, .3gp, ProRes, .m4a, .mp3, .gif
4K Video Formats: .mov, .mp4, .m4v, .mkv
Summary
Filmora X is a great choice as a video editor for Mac users. It is even a great editor for those who have just started using Filmora X. It is a sum total of the features, functions, and ease. The free trial is a comprehensive package for beginners that can help them learn all the features before they move from the entry-level to the expert levels. Those who are known as seasoned video editors consider this as a great tool to help the creative minds that want to give the world the best out of their projects.


